Friday, June 24, 2011

Plastic Bag Holder Tutorial


Being as I have just recently began sewing, I don't have much in the way of a stash. However, I have found a love for buying fat quarters when they are on sale simply because they are only a dollar. I had yet to ever actually use one until today! As I was cleaning I found I have a million plastic grocery bags floating around my house. Being that I am the queen of procrastinating and putting off cleaning, I decided I should make a home for them! Well here i what I made!

Here is what you will need to reproduce this bag:
1 fat quarter
16 inches ribbon
2 pieces of elastic - 11 inches and 6 inches


Step 1: Make your casing on the top and bottom. Do this by folding down 1/4 inch and ironing flat. Then fold over 1/2 inch, iron and pen. 


Step 2: On the top, you will pin on your ribbon. I did mine 1 inch from the ends, however you can do them wherever you want. I see now I would have liked them to be further apart. So I would do them about 4 inches apart from each other when I make this again. Sew the along the edge of your fold to create the casing for the elastic. I used a 1/8 seam allowance.


Step 3: Put a safety pin onto your elastic and pull through the casing. Use the 11 inch elastic on the top and the 6 inch piece on the bottom. Pin at each end.


Step 4: Sew the elastic down at the edge of the bag on all four corners. Also sew the ribbon on top so it will not hang away from the bag. I went 3 times over each one to secure the seam.


Step 5: Pin the long sides right sides together and sew (I used a 3/8 seam allowance) making sure to go over the elastic a couple times. You could do a french seam to enclose your edges. I didn't because I put my ribbon too close to the ends.

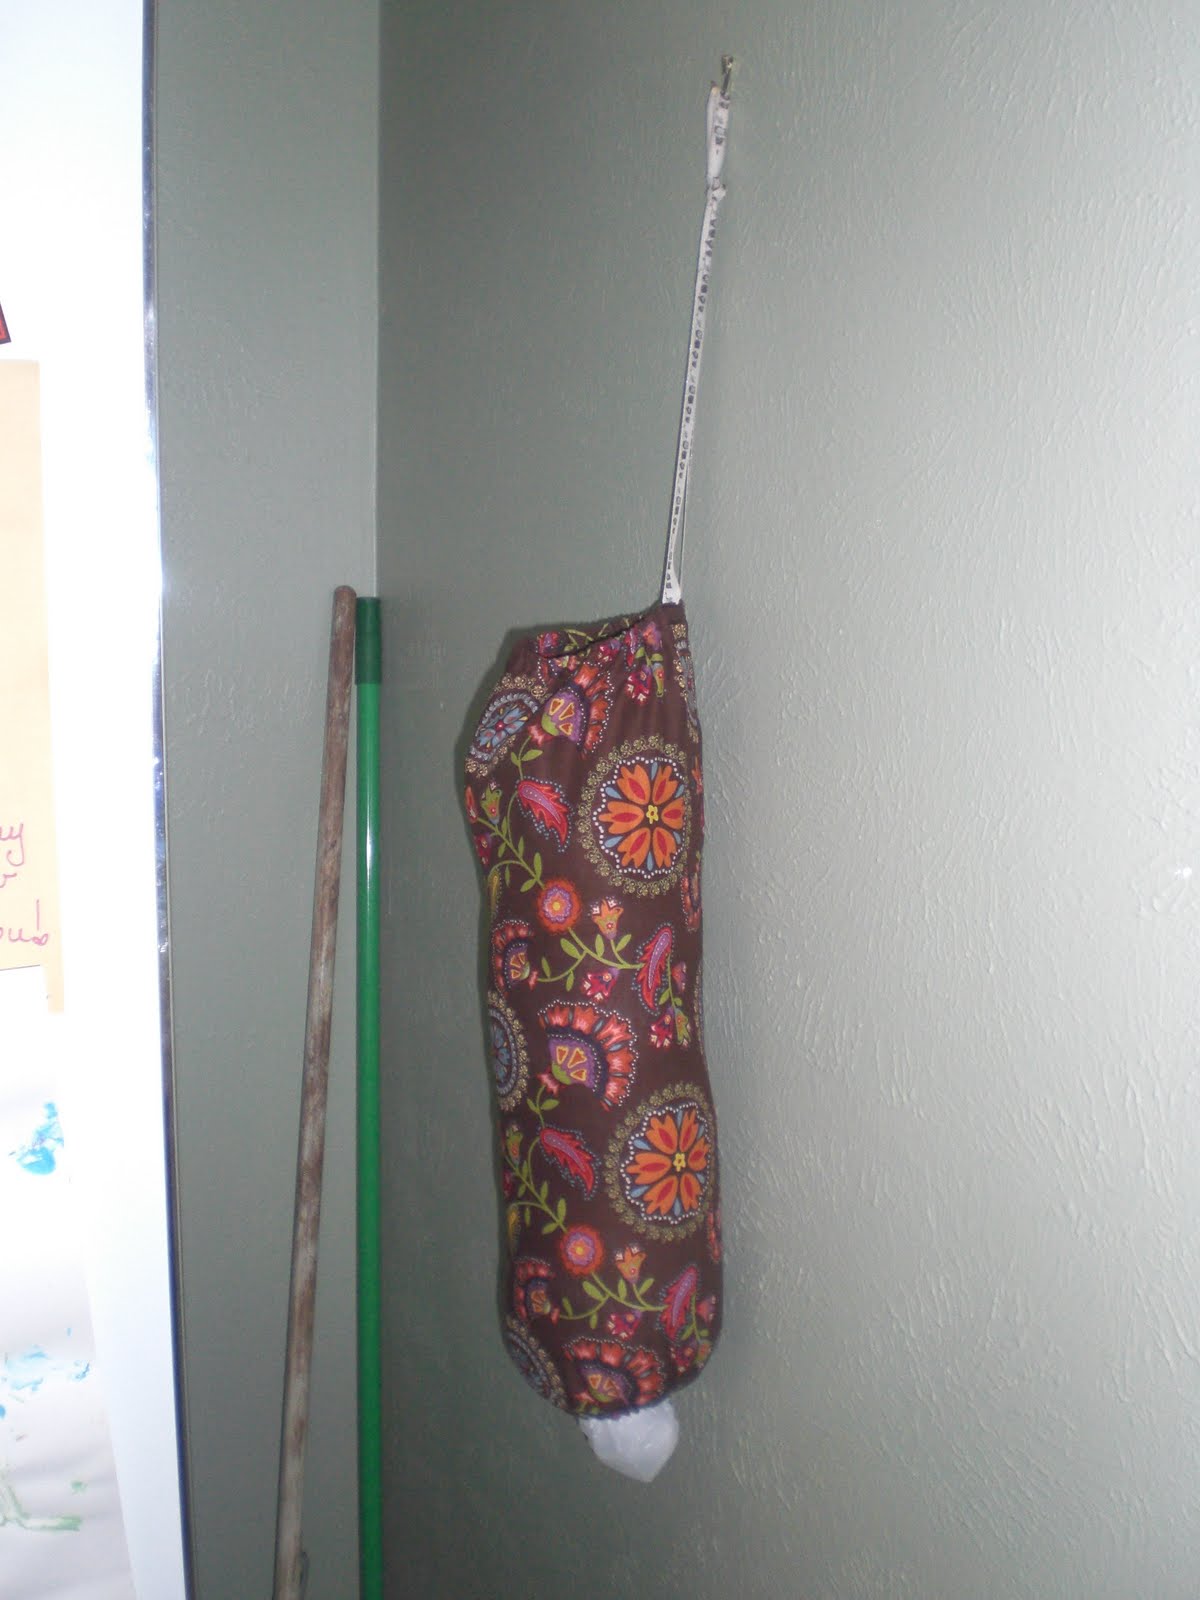
Step 6: Turn inside out, stuff, hang, and enjoy!!

I hope you enjoyed this tutorial! Most people put theirs in a closet, but because it matches my kitchen decor I figure it looks great in my nook beside the refrigerator!

Thanks for listening!


 * I'm linking up!


Wednesday, June 22, 2011

Pillow Fight - The Princess and the Pea Pillow

After reading Ladybird Ln's featured charity and contest, I knew it was definitely a project for yours truly. While I had never made a pillow case before, I found it was fairly simple when I followed the tutorial on Ladybird Ln's site found HERE. So here is my entry into the contest! It is also the pillow case I am sending to be donated for the cause! Some little girl will love it I am sure.


I thought it would be fun to make a princess out of felt. I think she turned out very sweet.


My inspiration was the Princess and the Pea. Aubrey loves this book. On the front of the pillow the main fabric is pink broadcloth with a felt princess sewn onto the right hand side. The band is purple cotton and the trim is lace.


The back of the pillow is the purple main fabric with a pink band. The trim is white eyelet. I thought using different trims and alternating the fabric would make the pillow look like a stack of cushions.


I added three green felt peas with a hand embroidered poem that reads:


The tallest bed she had ever seen


Cushions of purple pink and green


And beneath the covers she did not know


But three green peas layed down below


While my sewing was not perfect, I worked very hard to make a pillow that will cheer up any little princess! I am putting it in the mail today to send to Ladybird Ln! So excited to be entering my very first sewing contest ever! Wish me luck!!


Wednesday, June 8, 2011

Spring Ruffle Top and Father's Day Craft

Tutorial for this top found at Sew Mama Sew! I absolutely love it. The only thing I would have done differently is to have someone help me measure the straps. Mine ended up too big and my bra straps show in the front and back. 

On another note; Aubrey and I made Chris' Father's Day gift today! I know it was early but I have a wedding the weekend of and if I procrastinate too long, there won't be a gift.


I let Aubrey paint with edible paint made from flour and water and food coloring. The prints I did in acrylic paint because the other wasn't thick enough. After I finished her prints all she wanted to paint was her feet.


I think she may end up being a future Van Gogh :) Her pal Elena, just wanted to eat the paint ha! Good thing it was only flour and water.


Tell me what you did for Father's Day! I would love to hear some great ideas from other momma's.


Thursday, June 2, 2011

Lilac Summer Dress

 Today I finally grew some guts and decided I would make something for Aubrey out of the fabric I have been storing. Since it is the hot Texas summer already, linen is an obvious choice!

This was the first dress I have completed for Aubrey and let her wear in public! I am always so nervous everyone will critique my work and I'll break down in front of everyone. However, all the moms at the baby shower today said they loved her dress. Only one mom even guessed it was homemade. That felt pretty good and definitely gave me a little more courage.

I think the purple works for Aubrey. I think she thought so too. I love it how she walks around outside like she has something to do and some place to be.


The shed is her Daddy's "man cave" as I put it. He works out in there and stores his tools in there. Its like a black hole.... I steer clear...


Aubrey however kept knocking on the door saying "Daddy, Daddy" guess she thought he was in there hiding. As for the dress, there are things I will do differently next time, but I am pretty pleased with the outcome.