Monday, June 18, 2012

Cherry Round Up

Wow! The projects you put on here were great. I know we had a scant few to participate, but the theme was narrow. Thank you ladies who participated. To those who haven't looked, here are the Cherry themed entries.
Mom on Timeout made this delicious smoothies! I substituted soy yogurt to keep it vegan, but it was so refreshing and wonderful especially in this Texas heat I am stuck in.
 Will Cook for Smiles made these Cherry Limeade Pops! They are just as pretty as they are good. Trust me, Aubrey and I fought over the last one. I don't have a Popsicle mold, so I just used some Dixie cups and Popsicle sticks I had for crafts (never been used no worries).
A Lovely Mess crocheted these cherries. It makes me want to learn how to crochet! I have never learned or tried but if I could whip these up I could make a fun fruit bowl of crocheted fruit for Aubrey's play kitchen. Wouldn't that just be sweet...

I want to thank you girls for participating! (Even you mom!) It is always fun to see what other moms are doing and making. So if you haven't go check these ladies out. Their blogs are all fun! I will be keeping an eye out on what y'all do next :)

Was the themed party fun? I just love cherries and thought I should share the love!

Andie


Wednesday, June 13, 2012

Vegan Cherry Almond Muffins with Streusel Topping

So with all the awesome cherry-ness going on here, I wanna share a new muffin recipe I cooked baked up for you. I am pretty sure I have made my love for all things cherry well known. But I also love all things muffin. They are the perfect breakfast. Filling but light, fast and simple, and they make the whole house smell delicious when you bake em. Throw some cherries in there and I cannot resist.
My fear, when writing the recipe and as I was baking it, was the muffins being too dense. The key to keeping them light and airy is to stir as little as possible. What I am hinting at is Don't use a handmixer. Make sure you use a spoon or wooden spoon. And just stir until combined. Then fold in the cherries and almonds.
The final tip I will give ya, Keep them out of others reach. Seriously, you won't want to share. And my Aubrey got a hold of two and she pulled off the tops and discarded the rest. My mouth was gaping I was a little shocked.
Vegan Cherry and Almond Muffins with Streusel Topping

1 1/2 cups flour
1 tsp baking powder
1 tsp baking soda
Pinch of salt
1 Flax egg (1 Tbsp Ground Flax + 3 Tbsp water mixed together and refrigerated)
1/2 cup almond milk
2 tsp apple cider vinegar (or white will do)
1/4 cup applesauce
1 1/2 tsp vanilla extract
2 tsp almond extract
1/2 cup sugar
1 1/2 cup cherries, pitted and quartered (I didn't quarter mine but will next time)
1/4 cup ground flax
1 cup chopped almonds
1 recipe streusel topping (recipe below)

  • Preheat oven to 400 F and place muffin cups into muffin pan.
  • In a small bowl, mix milk and vinegar. It should curdle.
  • In a big bowl, stir together flour, baking soda, baking powder, and salt.
  • In another bowl, stir together  Flax egg, milk and vinegar mix, applesauce, extracts, and sugar. 
  • Combine the two together remembering not to stir to much so it will remain light and airy, just until moistened.
  • Fold in cherries, flax, and almonds.
  • Sprinkle with streusel topping liberally.
  • Pour into muffin pan. I made 12 muffins with this recipe.
  • Bake for 20 minutes and put on rack to cool so the bottoms don't get soggy.
  • Spread with Earth Balance butter and enjoy!
Streusel Topping

1/2 cup flour
1/2 cup almond flour
1/2 cup brown sugar
4 Tbsp Earth Balance butter, melted

  • Combine flours and sugar. Pour butter over and stir. Will be chunky.
 I hope you enjoy! Don't forget to link up anything cherry to my cherry link up HERE!

Andie

Saturday, June 9, 2012

Vegan Cherry Pie

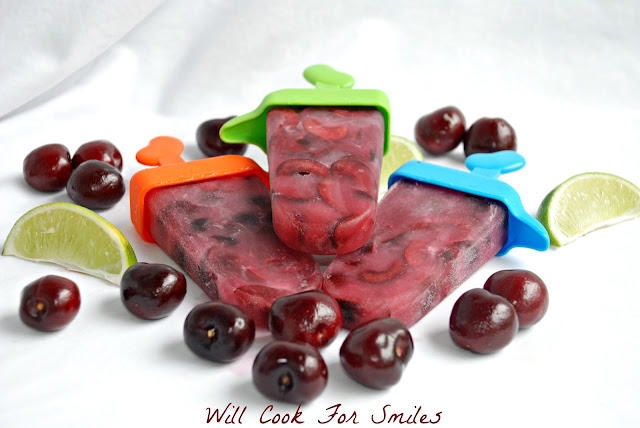
Does anybody else adore cherries? I bought 12 pounds of the stuff and spent naptime pitting them. My hands were stained, and my belly was full. Ha! Cherries are just American! They grow so well here and at $1.99 / lb how can you not get caught up in the love of all things cherry every summer.

It has actually become a thing where I make a cherry pie every summer. This year, I had to alter our recipe since we are now vegan. Turns out, we like it better then the other. It has less sugar, no cholesterol, and still tastes so good!
Pair this cherry pie with a scoop of dairy free ice cream and you have yourself an All-American dessert. This is even BBQ ready. Don't tell anybody and see if they notice. After it has been demolished (because it will be) tell everyone it is vegan. I guarantee they will all be surprised.

Pie Crust

2 1/2 cups unbleached all-purpose flour (I normally don't do white, but I was trying to use up what I had)
1 cup (2 sticks) Earth Balance butter, diced and put into the freezer
1/4 tsp salt
2 Tbsp sugar (I used turbinado)
1/4 cup ground flax seed meal
5-6 Tbsp cold dairy free milk (almond, soy, coconut, rice)

  • Put flour, salt, sugar, and flax into the food processor and pulse til combined.
  • Add in the butter and run until the largest pieces are no larger then peas.
  • Pour in milk 1 or 2 Tbsp at a time until it comes together. The drop your dough into a bowl.
  • Make the crust into a ball and refrigerate at least an hour.
  • After the hour split the dough into two and roll out using a generous amount of flour.
  • Keep one crust full and lay it into the dish. Pour in Cherry Pie Filling (recipe below).
  • Pull or cut off dough that falls over dishes edge and then fold over pinching as you go to create interest.
  • With the second crust, use a star shaped cookie cutter and cut out stars laying them on the cherry filling. I made a circle of stars and then did another circle laying atop the first layer of stars. Then put one in the center.
  • Brush with cold milk for browning.
  • Bake pie at 375 F for 40-55 mins. Check often so pie doesn't overbrown.
  • Rest the pie for an hour to let filling set. Serve warm with your favorite vanilla ice cream.

Cherry Pie Filling

6 cups pitted cherries
1 1/2 cups dried cranberries
Juice of 1 orange
1/2 cup sugar (again, i used turbinado)
2 tsp vanilla
1 Tbsp corn starch

  • In a saucepan combine cherries, cranberries, and sugar and put on medium heat. Squeeze orange juice into the pan and bring to a boil. Let boil until cherries become tender, about 5-10 mins.
  • Pour half the juice into a cup. In cup, stir vigorously while adding cornstarch to avoid lumps. Then, add back to the sauce pan.
  • Bring back to a boil. Let boil until sauce begins to thicken, another 10 mins. 
  • Stir in vanilla and let cook another minute more.
  • Take off heat and let cool about 10-20 mins. Add to pie crust.
*Note: We used the leftover pastry dough for a treat. We cut it into chips then baked until golden brown. Serve pie crust chips with tofu cream cheese and if you make a double batch of pie filling, you can pour over cream cheese and have a tasty dip, party worthy.

Enjoy!

And be sure to link up all your cherry posts to the Linky Party HERE!

Friday, June 1, 2012

Menu and Chore Charts

Okay so, If there were a competition for cutest toddler pic ever, I would win. Look at those faces! It was totally impromptu where they all linked hands and headed off. *If you are wondering, this is of my niece, Aubrey, and my nephew.

Moving on! We went to visit family in Oklahoma Sunday, Monday, and Tuesday. Had a good trip. I did pictures for my family. First photo shoot ever went pretty well, but I wouldn't consider myself a bona-fide photographer just yet.


Here is what I've been working on! I'm super excited about it. Its a menu board.Originally I wanted to just buy a whiteboard, until I saw how much they cost. $15 is a little much for a whiteboard in my opinion. So I hit up the clearance aisle and found this adorable frame screaming my name for $5. I already had the paper. All I did was to put a piece of blank scrapbook paper in place of a picture. I then wrote on the paper with a sharpie. MENU on top and then the days of the week down the side. I put the frame back together, glass and all and closed it nice and tight. NOW! Look what I can do!!!

(Edit: Apparently this was not a new idea! I just found another blogger doing the exact same thing today. Sooo, while it may not be new, it is fun to have! and make)
I can now write down my menu plan for dinners throughout the week using dry erase markers. Pure genius if you ask me! Ha! And with my new found intelligence, I thought "Why wouldn't this work for a chore chart?" So I made one of those too only this frame was just a dollar!!
I also picked up some cutesy stickers. Whenever Aubrey completes a chore without having to take a timeout, she gets to put a sticker on her board. Then when she has completed a whole row, we will go to the thrift store and let her pick out a new to her book (50 cents a piece, SCORE). Of course the grid I drew on the paper and also the chores on top is done with stickers I had. Everything else is dry erase marker and acid free stickers. So there you have it, a super cheap and simple way to organize your menu plans and chore chart!